With a few supplies, you can transform an inexpensive foam craft pumpkin into something beautiful, personalized, and complementary to your home's style.
Here are some of my favorite methods for turning a craft pumpkin into beautiful fall decor.


With Halloween and Thanksgiving around the corner, it's PUMPKIN TIME! I am slightly obsessed with pumpkins, both the real and the decorative variety. I just love the unique shapes, colors and sizes they come in, and how they can be made to look ghoulish and garish or absolutely elegant.
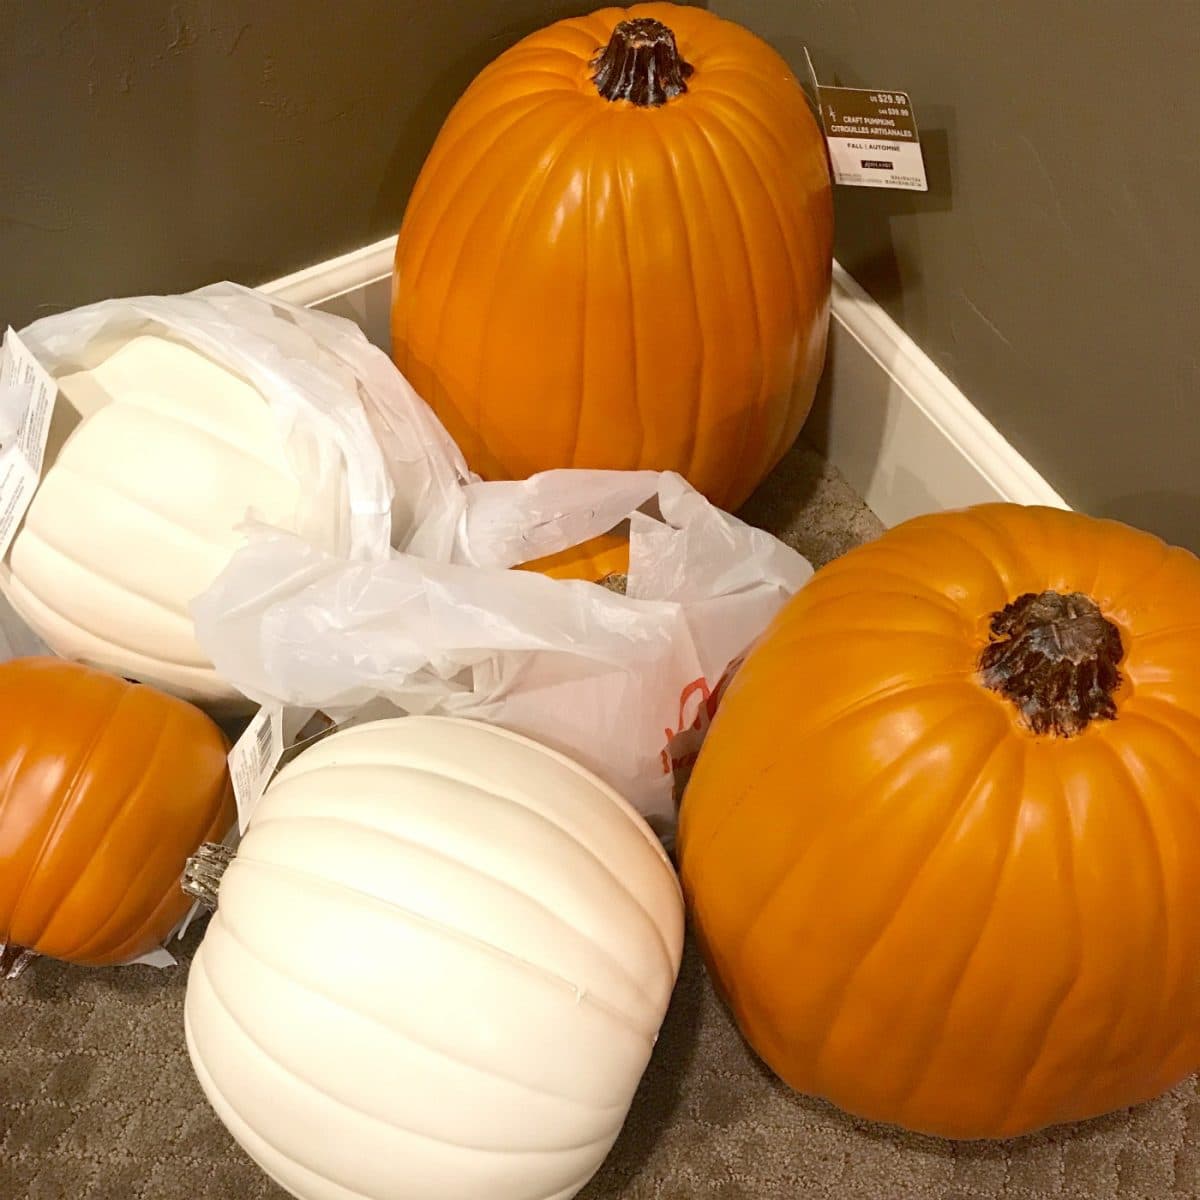
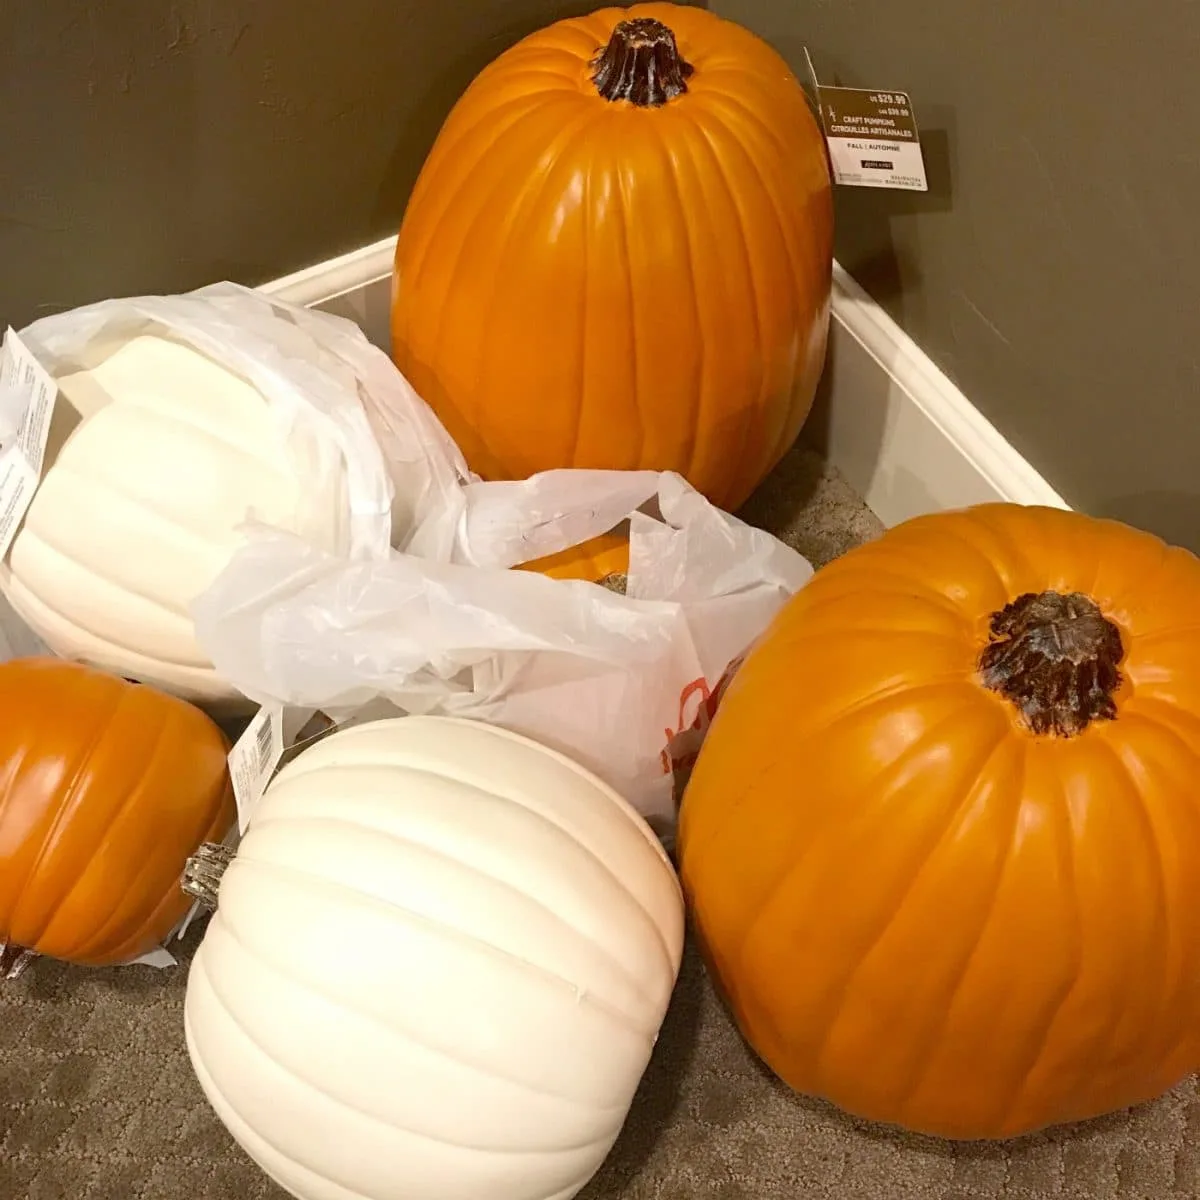
My newest obsession is with foam craft pumpkins. I recently scored a huge cart full of craft pumpkins at Michaels for 50% off.
On their own, they aren't the prettiest -- they are sort of cheap looking and obviously fake. But I found that you can easily "un-cheapen" them with some paint, glue and creativity.
Six easy ways to upgrade a craft pumpkin:
1) Carve it
Growing up on the east coast, I loved the tradition of carving real pumpkins, gooey innards and all. Unfortunately, Houston weather and real pumpkins don't mesh very well.
I learned that the hard way after the pumpkin I'd spent hours carving turned to moldy mush less than a day after I set it on the porch.
Craft pumpkins are the perfect solution to that problem. All of the hard work that you put into your design will last for YEARS, not days.
You'll want to use a hot knife to carve your craft pumpkin. A hot knife is essentially just an exacto blade that heats up to allow you to carve through the foam easily and smoothly.
I was a little scared of it at first (sharp, hot things are a little frightening), but within a few minutes of using it, I actually found the hot knife carving process really fun and almost relaxing. Not to mention, it's totally mess-free!
If you're just starting out with a hot knife, I recommend keeping it simple! A monogram, a single shape, or a pumpkin face works best.

2) Paint it
I recently purchased some Annie Sloan chalk paint* in Old White for a DIY home project, and since I had it on hand I decided to try it out on my pumpkins. The great thing about chalk paint is that it adheres to just about any surface (no priming or sanding required), and gives a matte look, which is lot nicer than the plasticky sheen of the unpainted pumpkins.
*Annie Sloan is a high end brand of chalk paint, but you can also find basic, inexpensive chalk paint at a craft store that will work just as well on a project like this.
After applying two coats of paint and letting them dry, I used a few dabs of dark wax to fill in the grooves of the pumpkin to give it a more realistic look. Again, I used Annie Sloan dark wax, but you can find similar waxes at a craft store in the same area as the chalk paint.

Chalk paint is just one way to upgrade your pumpkins with paint. You can also use spray paint, stencils or any design you'd like.
If you're really artistic, you can even use your pumpkin as a canvas to create your own masterpiece, like this beautiful floral painted pumpkin.
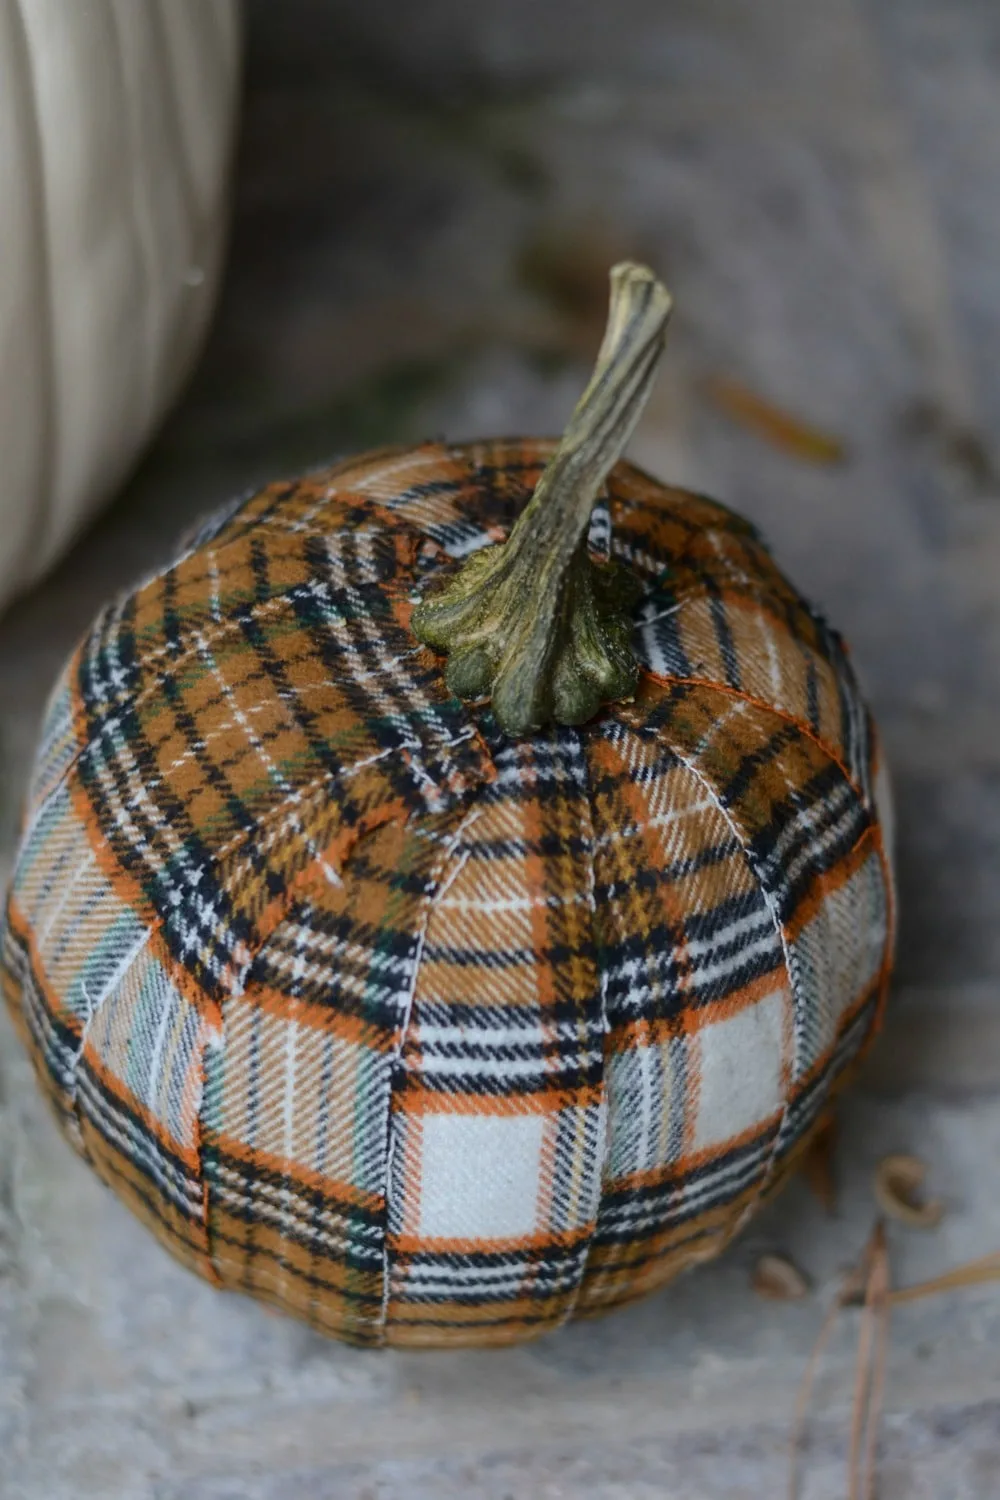
3) Cover the pumpkin with fabric
While browsing on Pinterest, I fell in love with these fabric-covered craft pumpkins from Unoriginal Mom. She simply cut strips of fabric and use Mod Podge to create gorgeous fabric-covered pumpkins.
I wanted to try this method out with some soft plaid fabric because I loved the fall colors and the cozy vibe. I went into the project knowing full well that it might be an epic fail, but it worked surprisingly well.
I just cut the fabric into 2-3 inch strips, brushed Mod Podge on the pumpkin, and smoothed the strips over the adhesive.

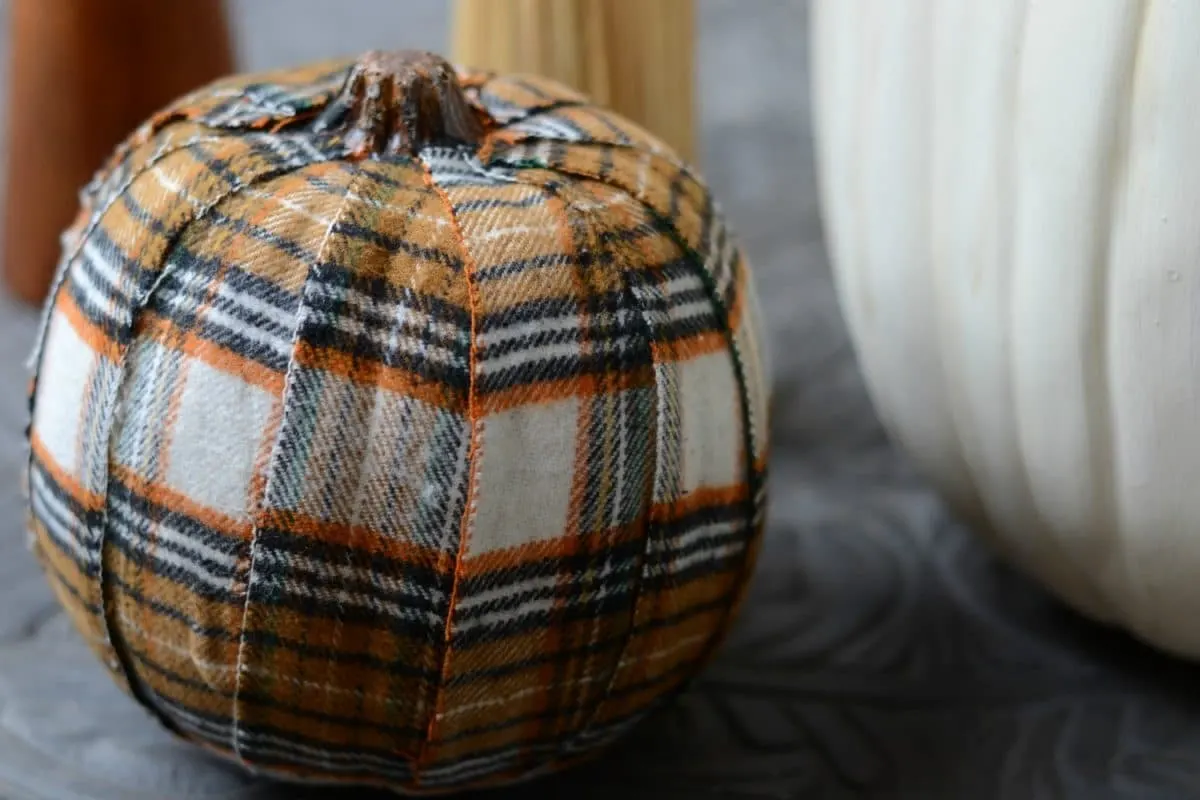
This method is a great way to use up scrap fabric, and/or to customize your pumpkins to match your decor.
4) Turn your pumpkin into a vase
This pumpkin upgrade is so beautiful, and SO easy to do.
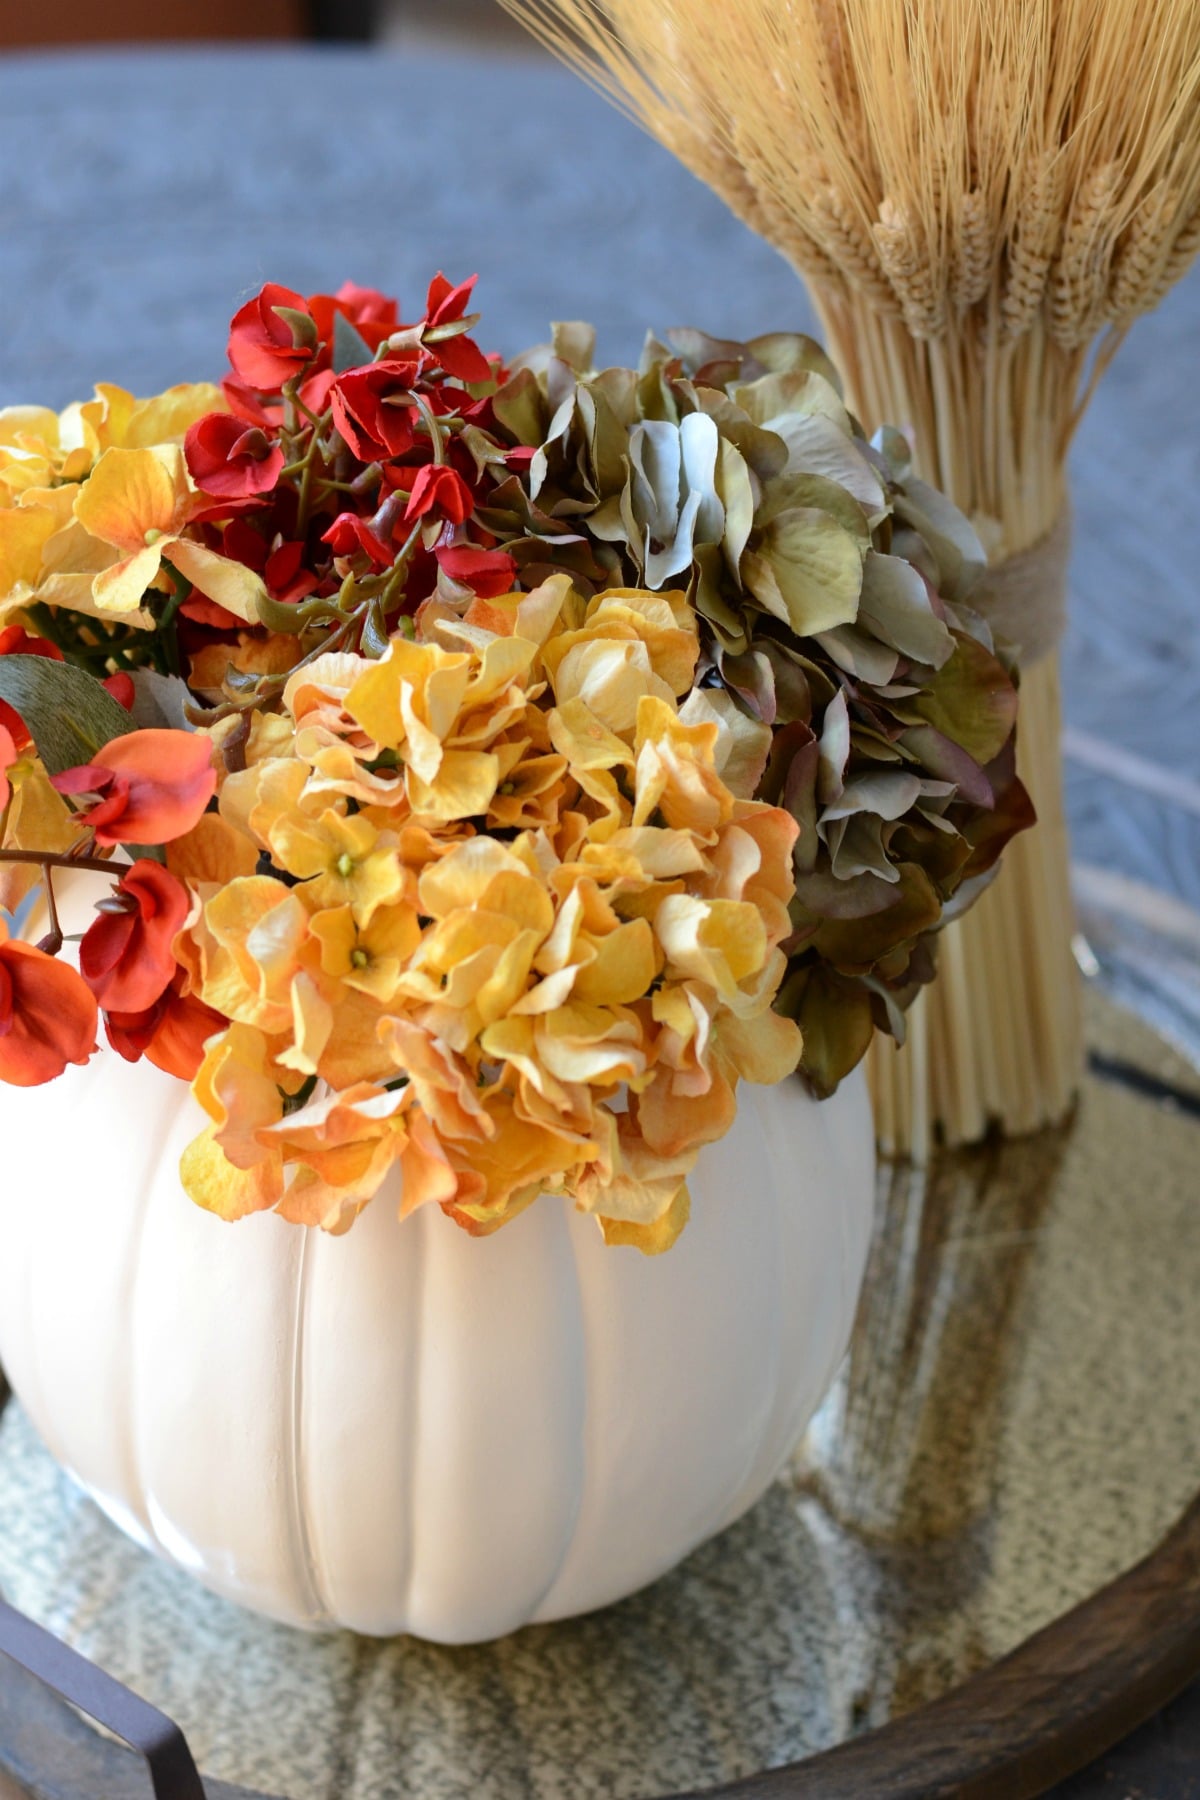
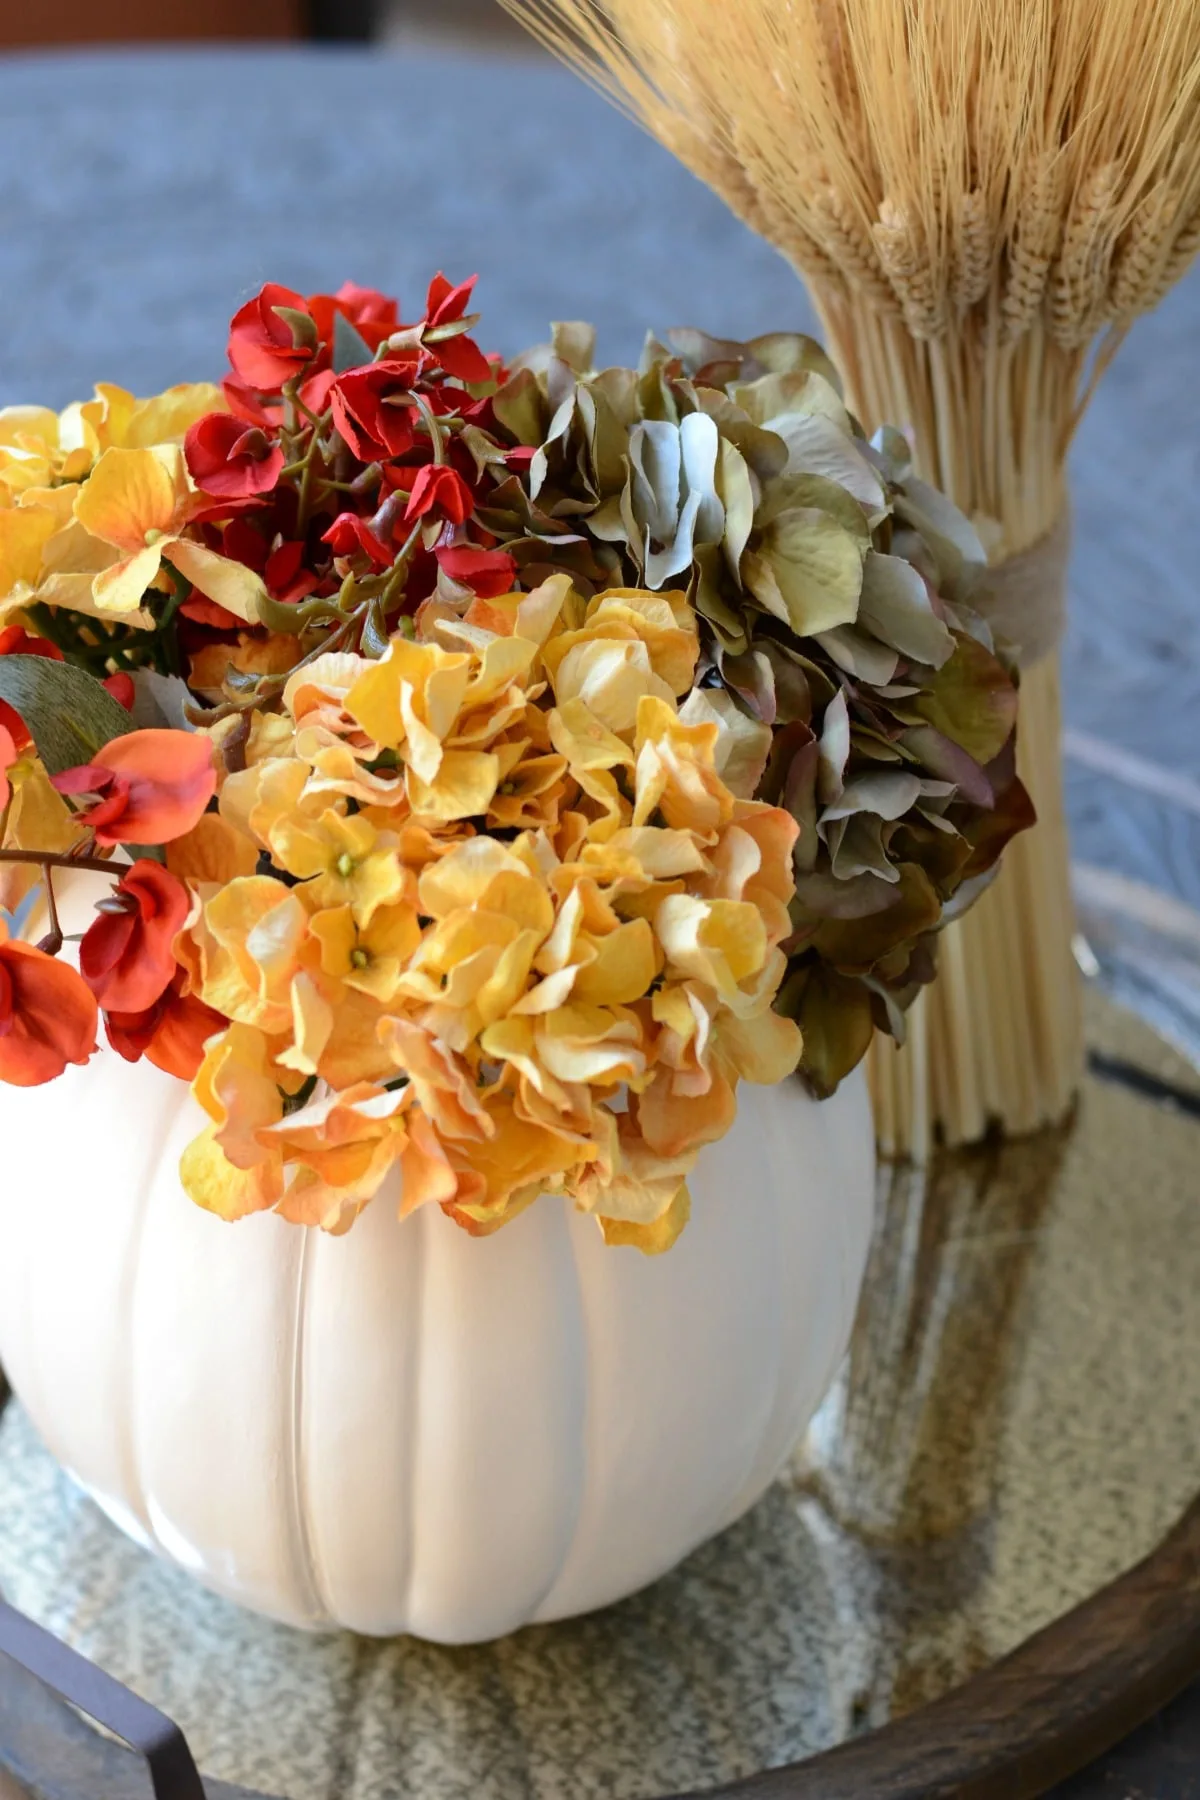
Again, you might want to use a hot knife for this, but a box cutter will work, too, since you don't need your carving to be intricate.
If you're planning to use artificial flowers, then just cut out an opening in the top, pop the flowers in, and arrange to your liking.

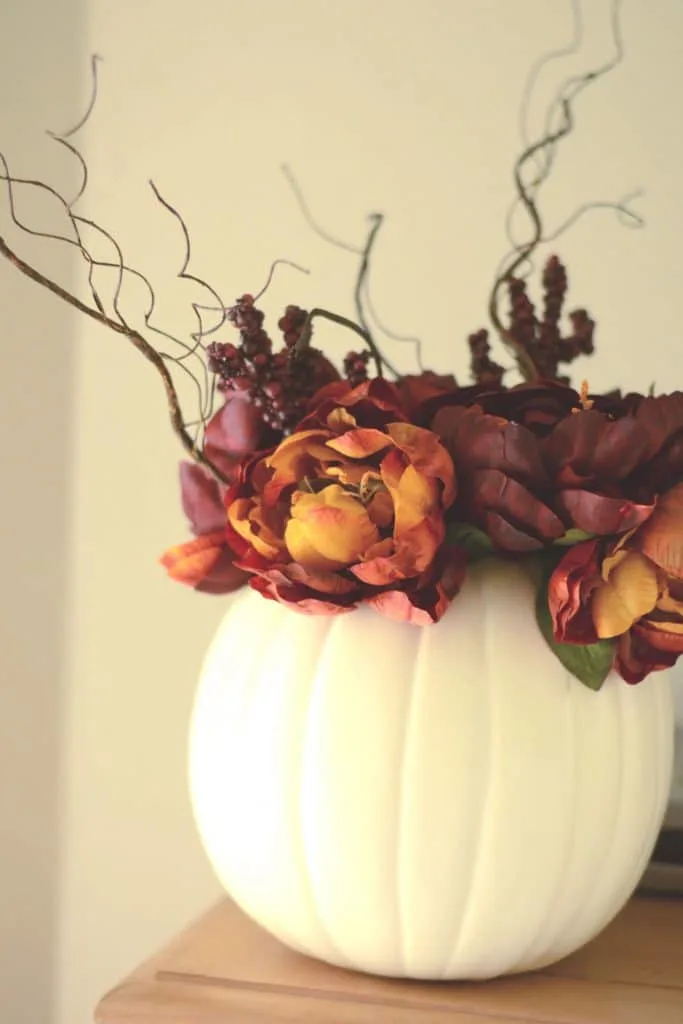
If you want to use real flowers, then you'll want to insert some sort of cup or vase to hold the water. I chose to use a mason jar since it was close in size to the pumpkin, and it only cost $1.
Simply measure the size of the opening you'll need, cut it out, and pop in your glass. A pumpkin vase makes a beautiful centerpiece that you can use all throughout the fall.
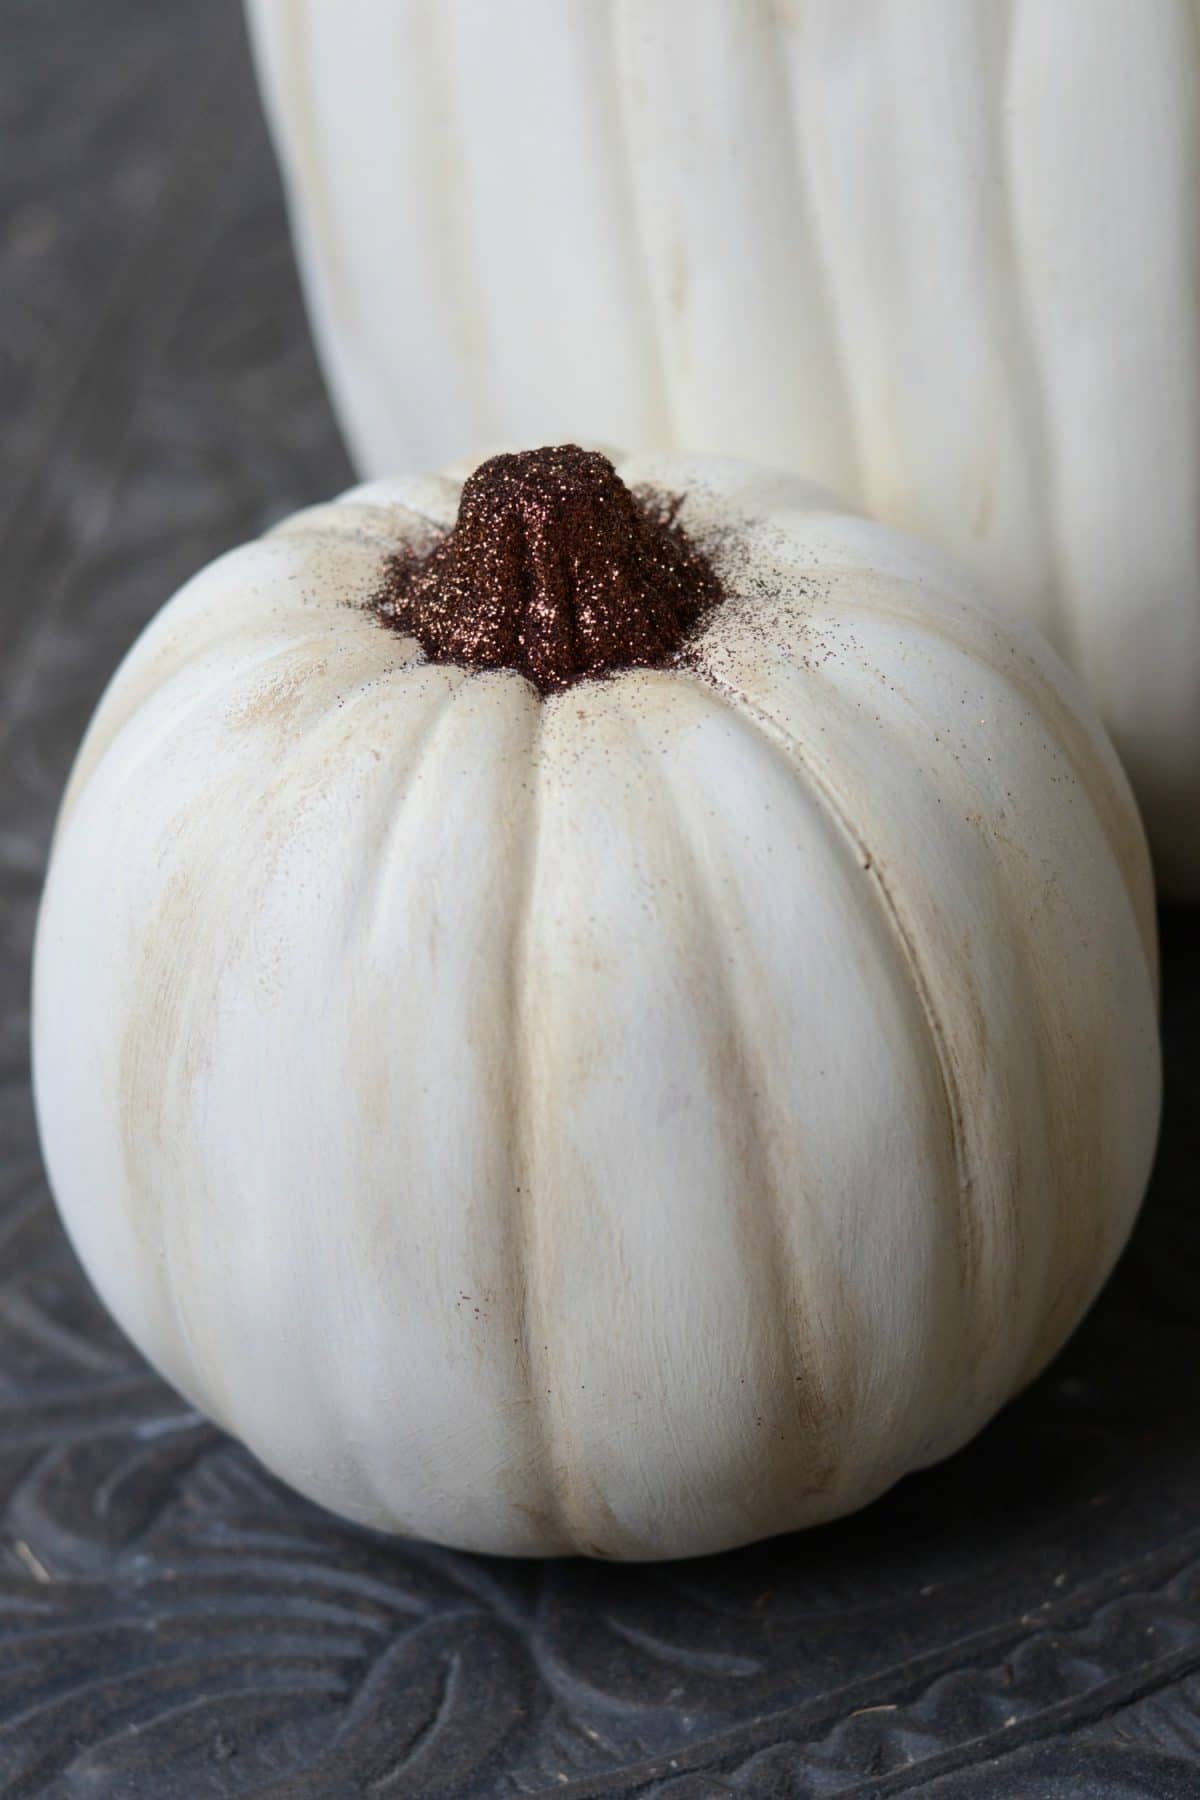
5) Upgrade the stem
The stems of the craft pumpkins are my least favorite part -- they just look sort of cheaply painted and not at all like a real pumpkin stem.
To quickly and effectively upgrade your craft pumpkin stems, just coat them in some glue or some Mod Podge and sprinkle on a coat of fine glitter.
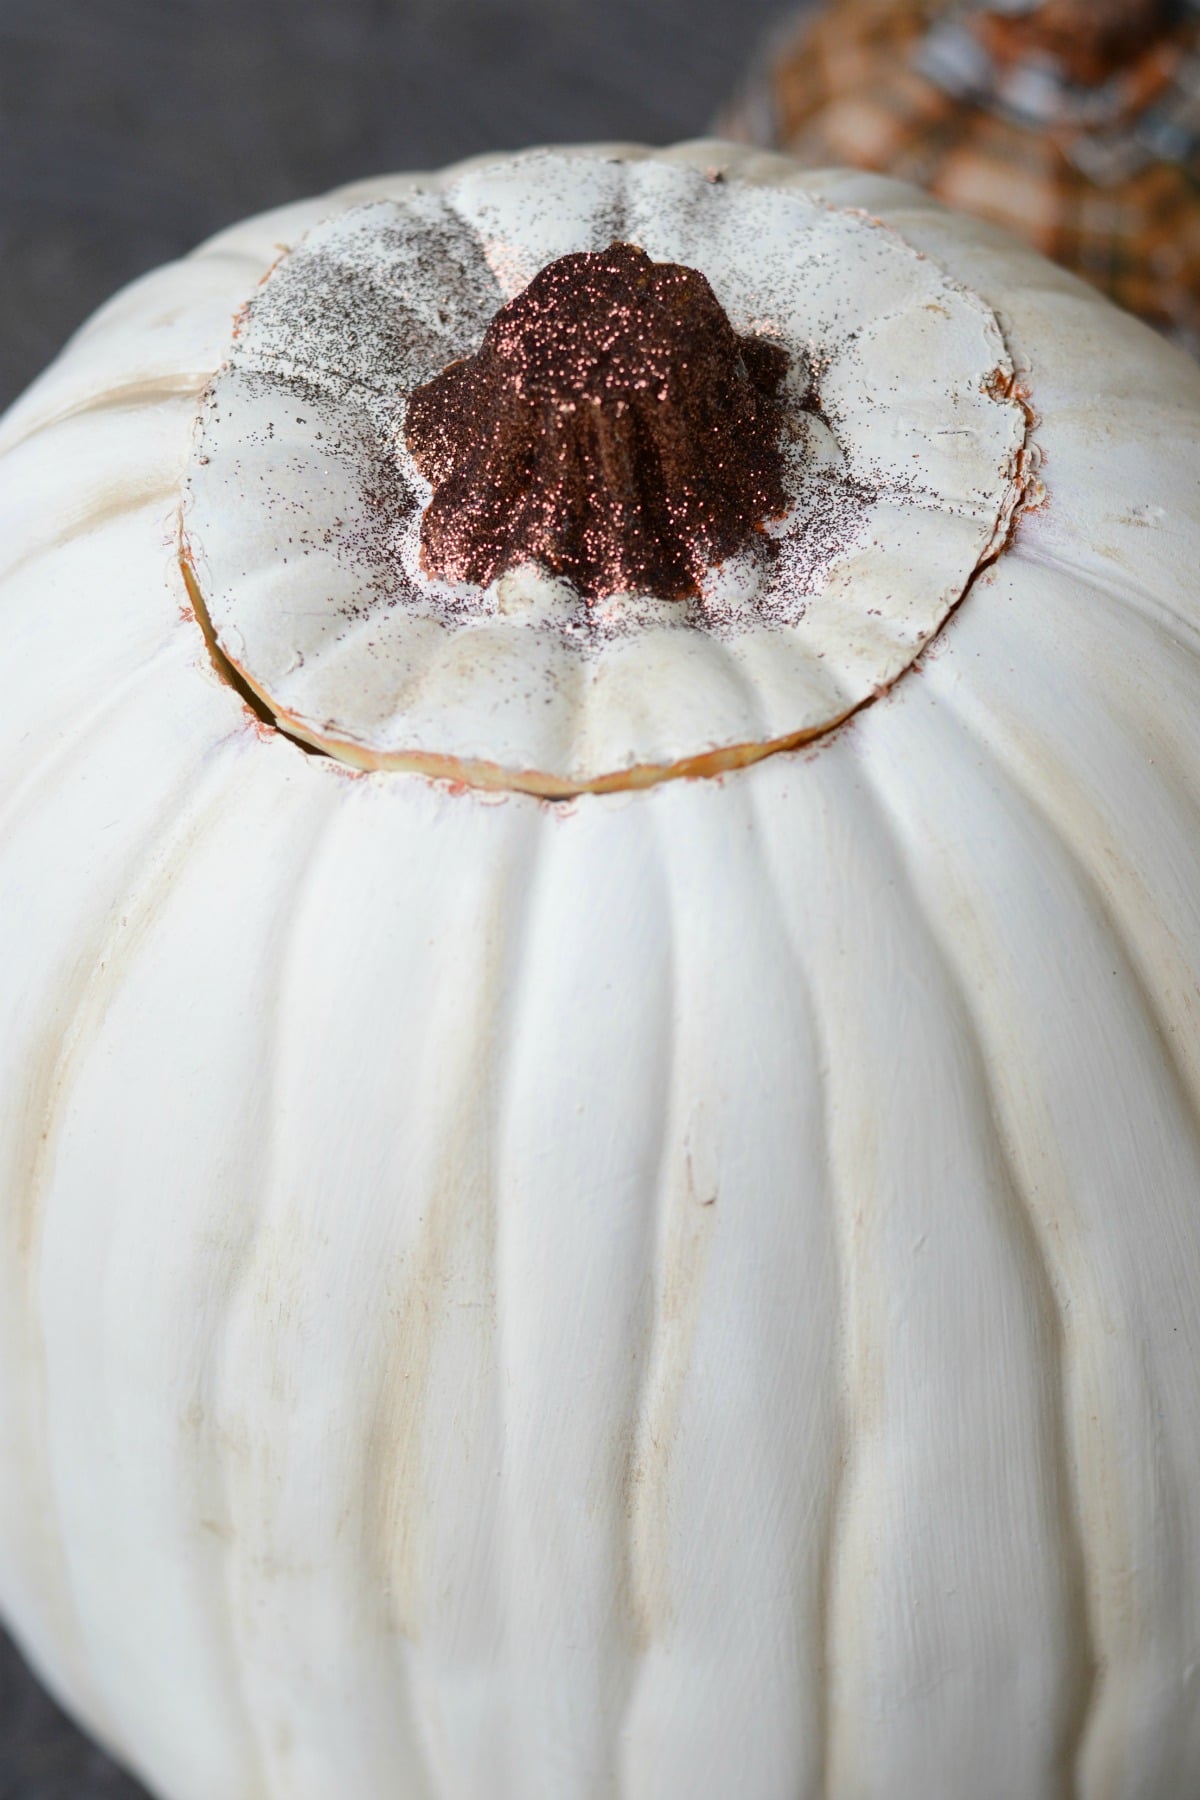
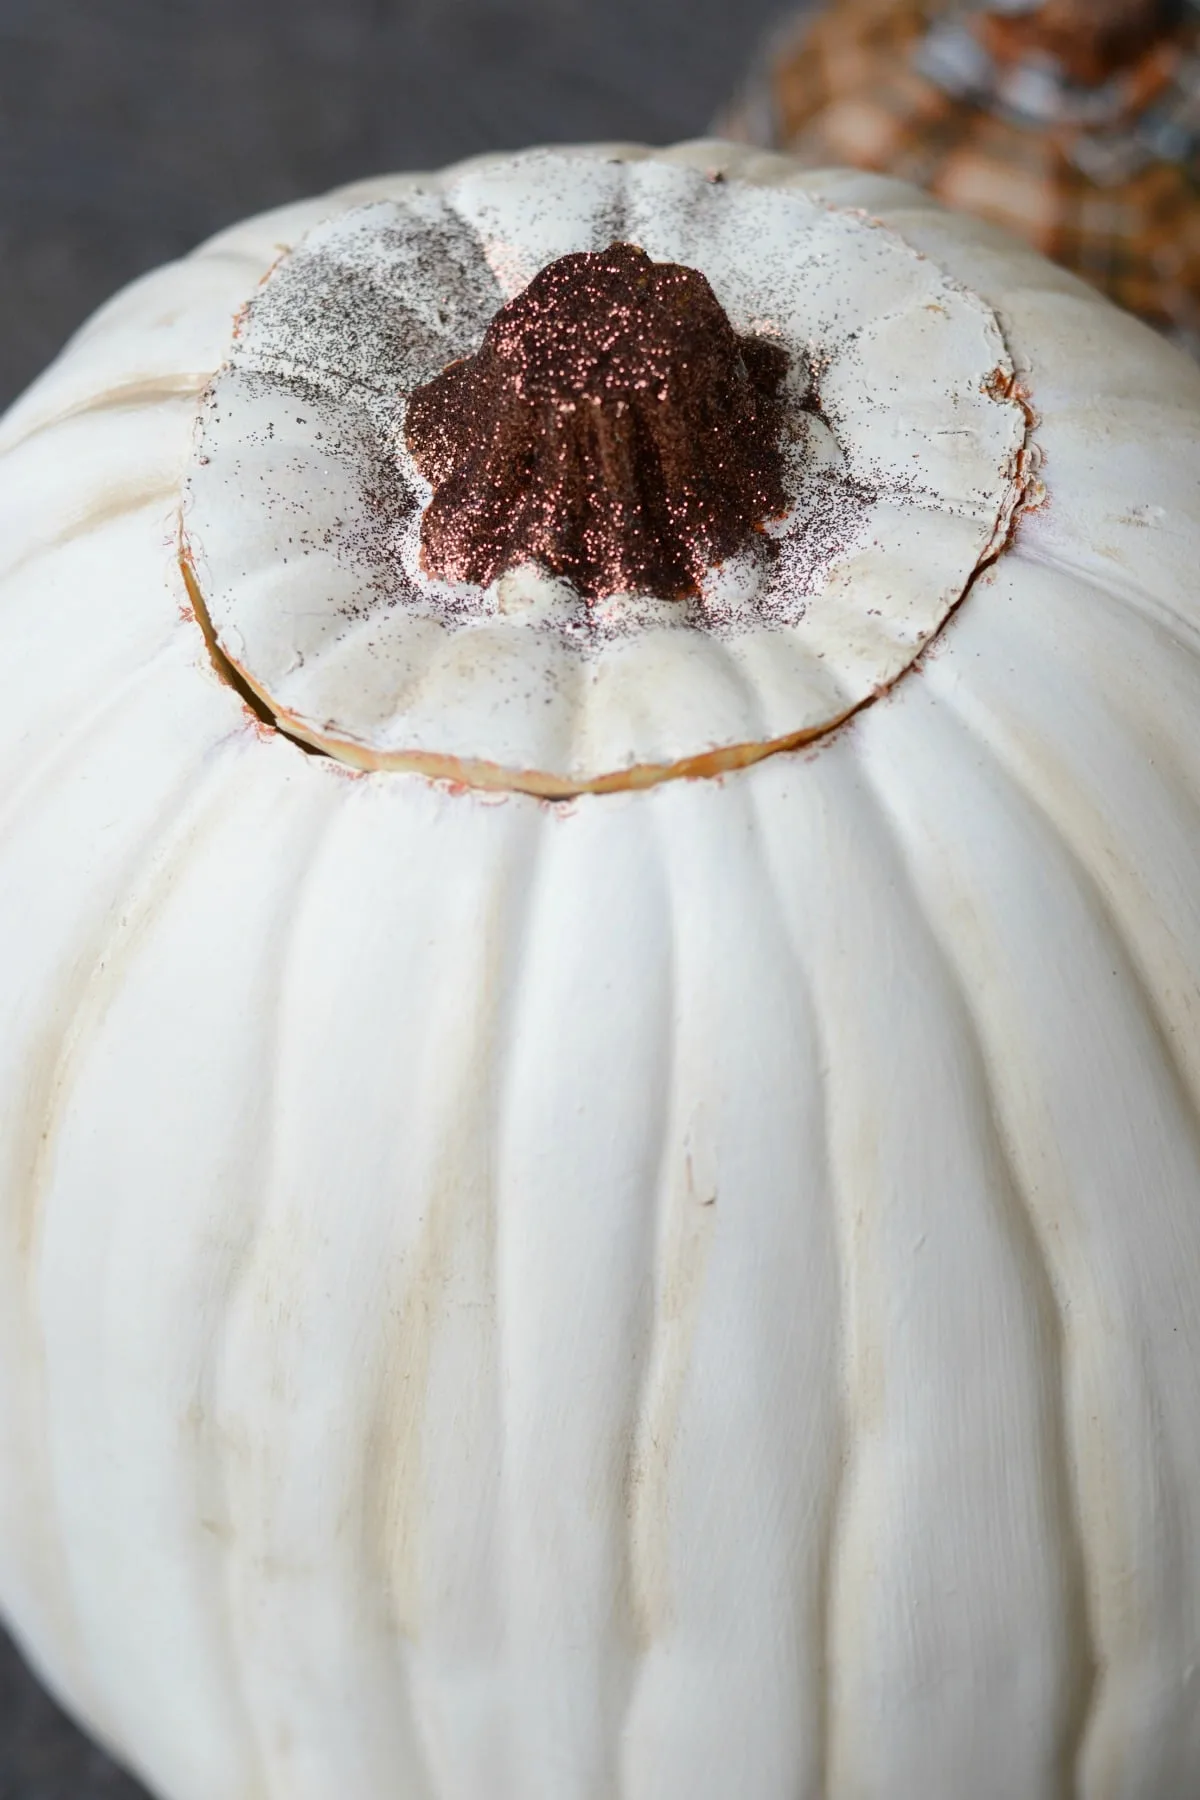
Another genius idea I came across was to cut out the stem and replace it with an actual pumpkin stem. Obviously you won't want to buy a nice, expensive pumpkin just to cut out its stem, but if you're already planning to buy some real pumpkins or you come across some stray stems at the local pumpkin patch, you can try this idea.

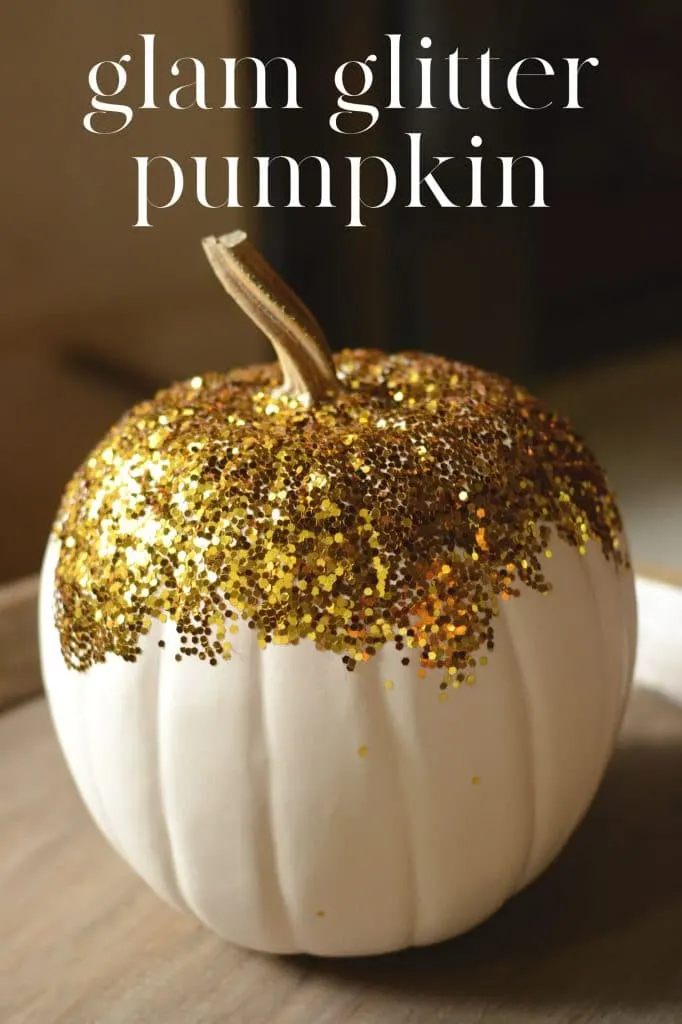
6) Add some glitter
If you're going for a modern or glamorous look with your fall decor, just add glitter!
To create this look, I covered the top of the pumpkin with Mod Podge and then sprinkled on the glitter. You can cover the whole pumpkin if you'd like, but I wanted to make it look like the glitter was just cascading over the top.
I also removed the fake stem on this pumpkin and replaced it with a real stem.

Have you experimented with craft pumpkins? If so, I'd love to hear about it!
Lilly
Thursday 16th of November 2017
These are great tips, Alyssa. I really like the pumpkin vase idea. So creative!
Linda Riley
Friday 13th of October 2017
Great ideas!